
What is Dashbot?
The #1 Conversational Analytics & Business Intelligence Platform. Connect your conversations, analyze your data & take action!
What is Conversational Data and Why Does It Matter?
Conversations can happen anywhere. Capturing these conversations is one thing and understanding them is another. It is crucial to understand these conversations in order to grasp customer behaviors, preferences, and sentiments. However, its complex nature often makes actionable insights elusive, posing a substantial challenge.
Dashbot Unlocks Insights in your Conversational Data
Understanding the complexity of conversational data is only the first step. To transform this data into actionable insights and strategic decisions, businesses require a sophisticated yet user-friendly tool.
Dashbot is a powerful platform designed specifically for deciphering the nuances of conversational data. The extraction of critical insights enables a deeper understanding of customer interactions. This enhances decision-making and significantly improves customer engagement strategies, ensuring you can respond to and anticipate their needs.
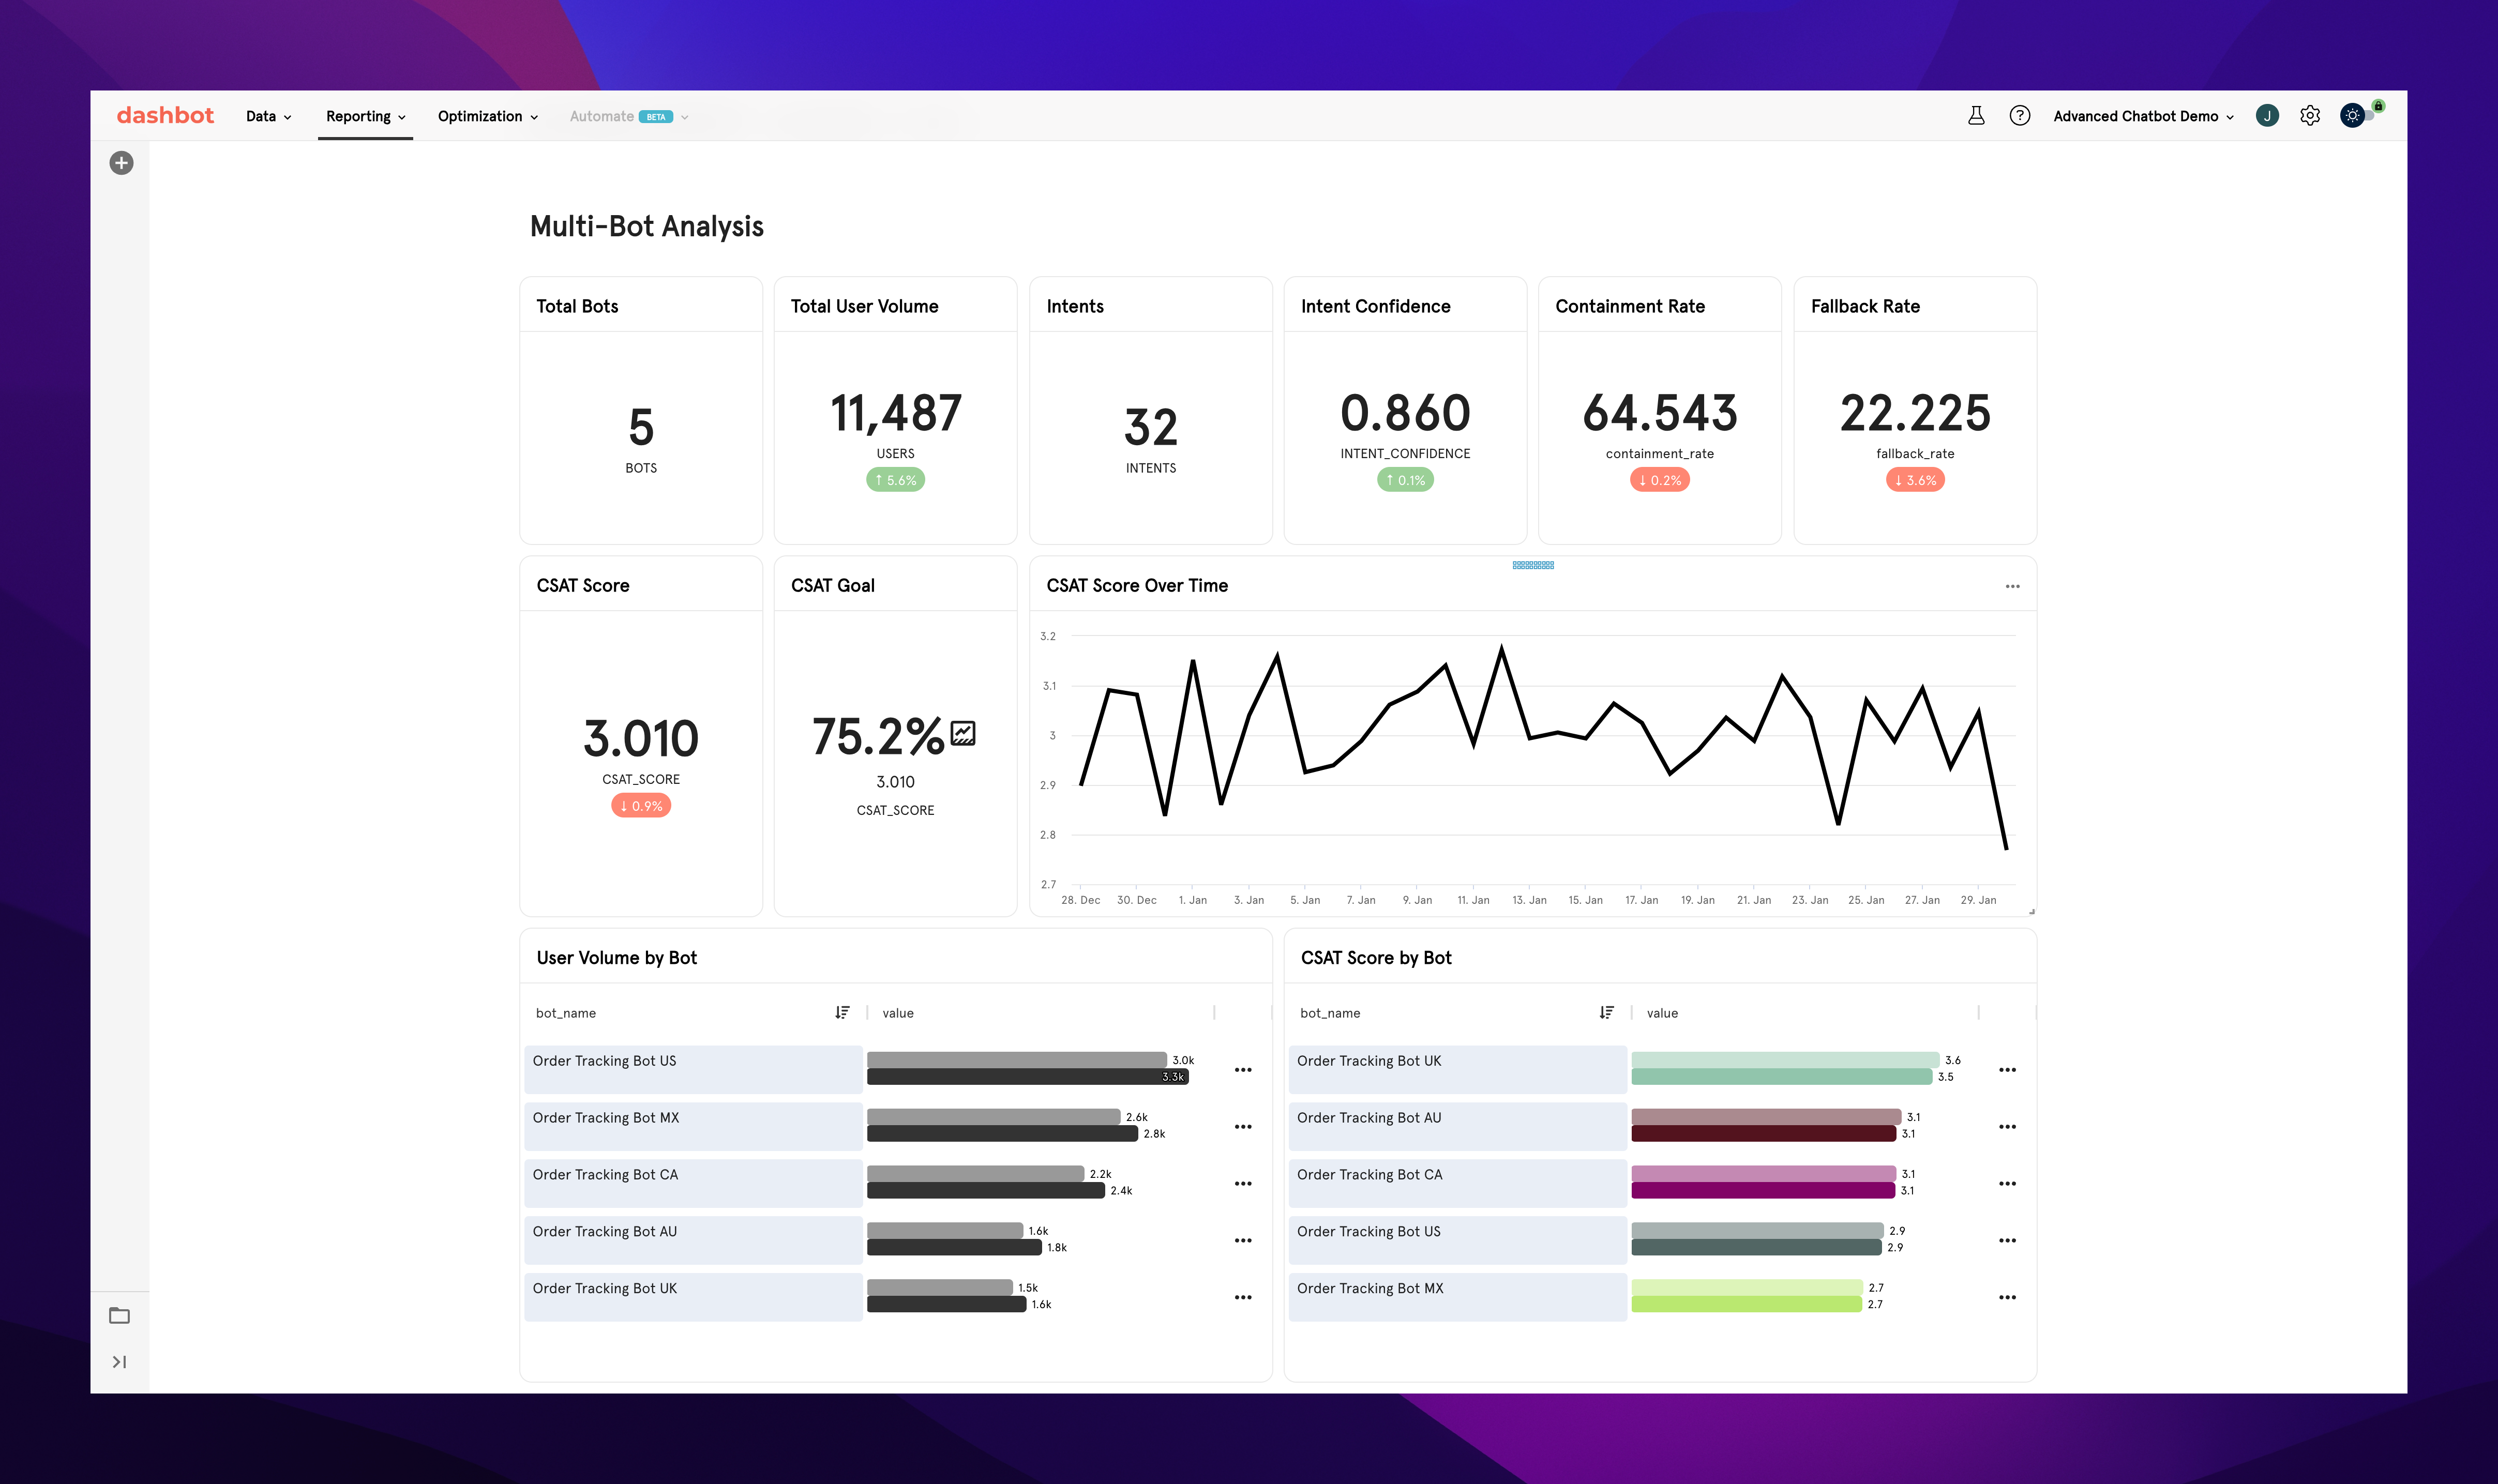
Analytics Designed for Conversations
Visualize your conversations better than your data science team ever will.
Dashbot is a conversational data platform that ingests, cleans, processes, and structures your raw data with just a few lines of code. Dashbot then enables you to analyze your conversational data with native reports and visualize this data with just a few clicks. You will be able to access insights to data you simply cannot process with traditional tools like Tableau and SQL.
Our no-code data platform & tooling empowers your team to answer questions, no matter their data expertise. The purpose built design of Dashbot also allows users to lean into their data and to discover their own insights as well as design custom dashboards.
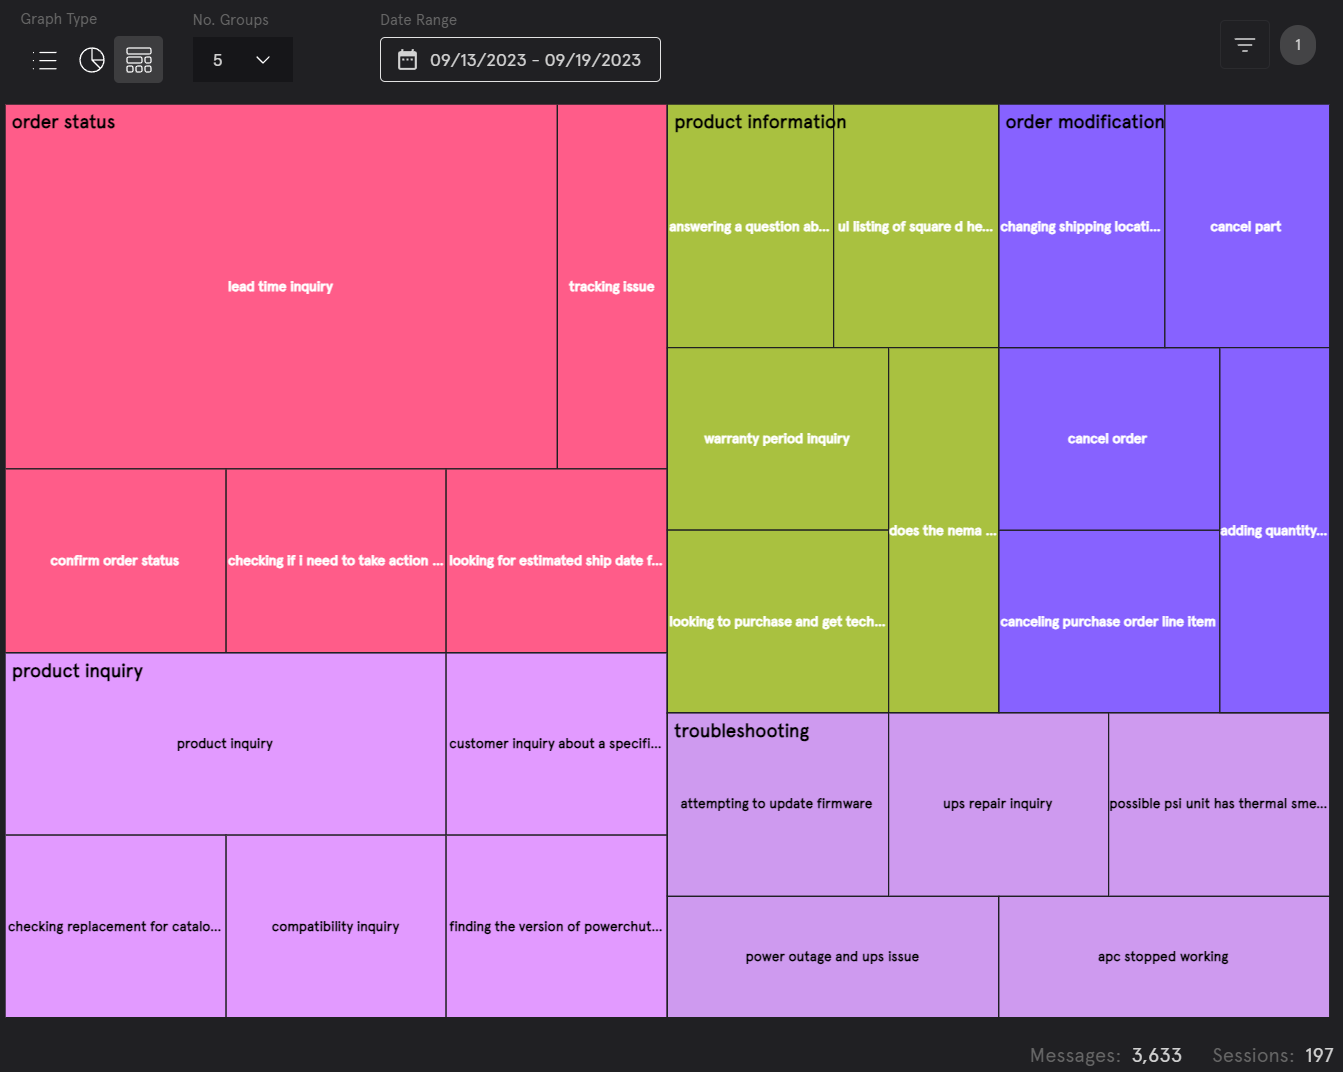
Typical analytics tools track conversational interactions in the form of events.
Dashbot instead relies on a different data model to understand the richness of a conversation. By leverage NLP models developed over the course of the last decade, Dashbot turns conversational information into actionable insights. Custom dashboards to view all your conversational data metrics and trends is the tip of the iceberg.
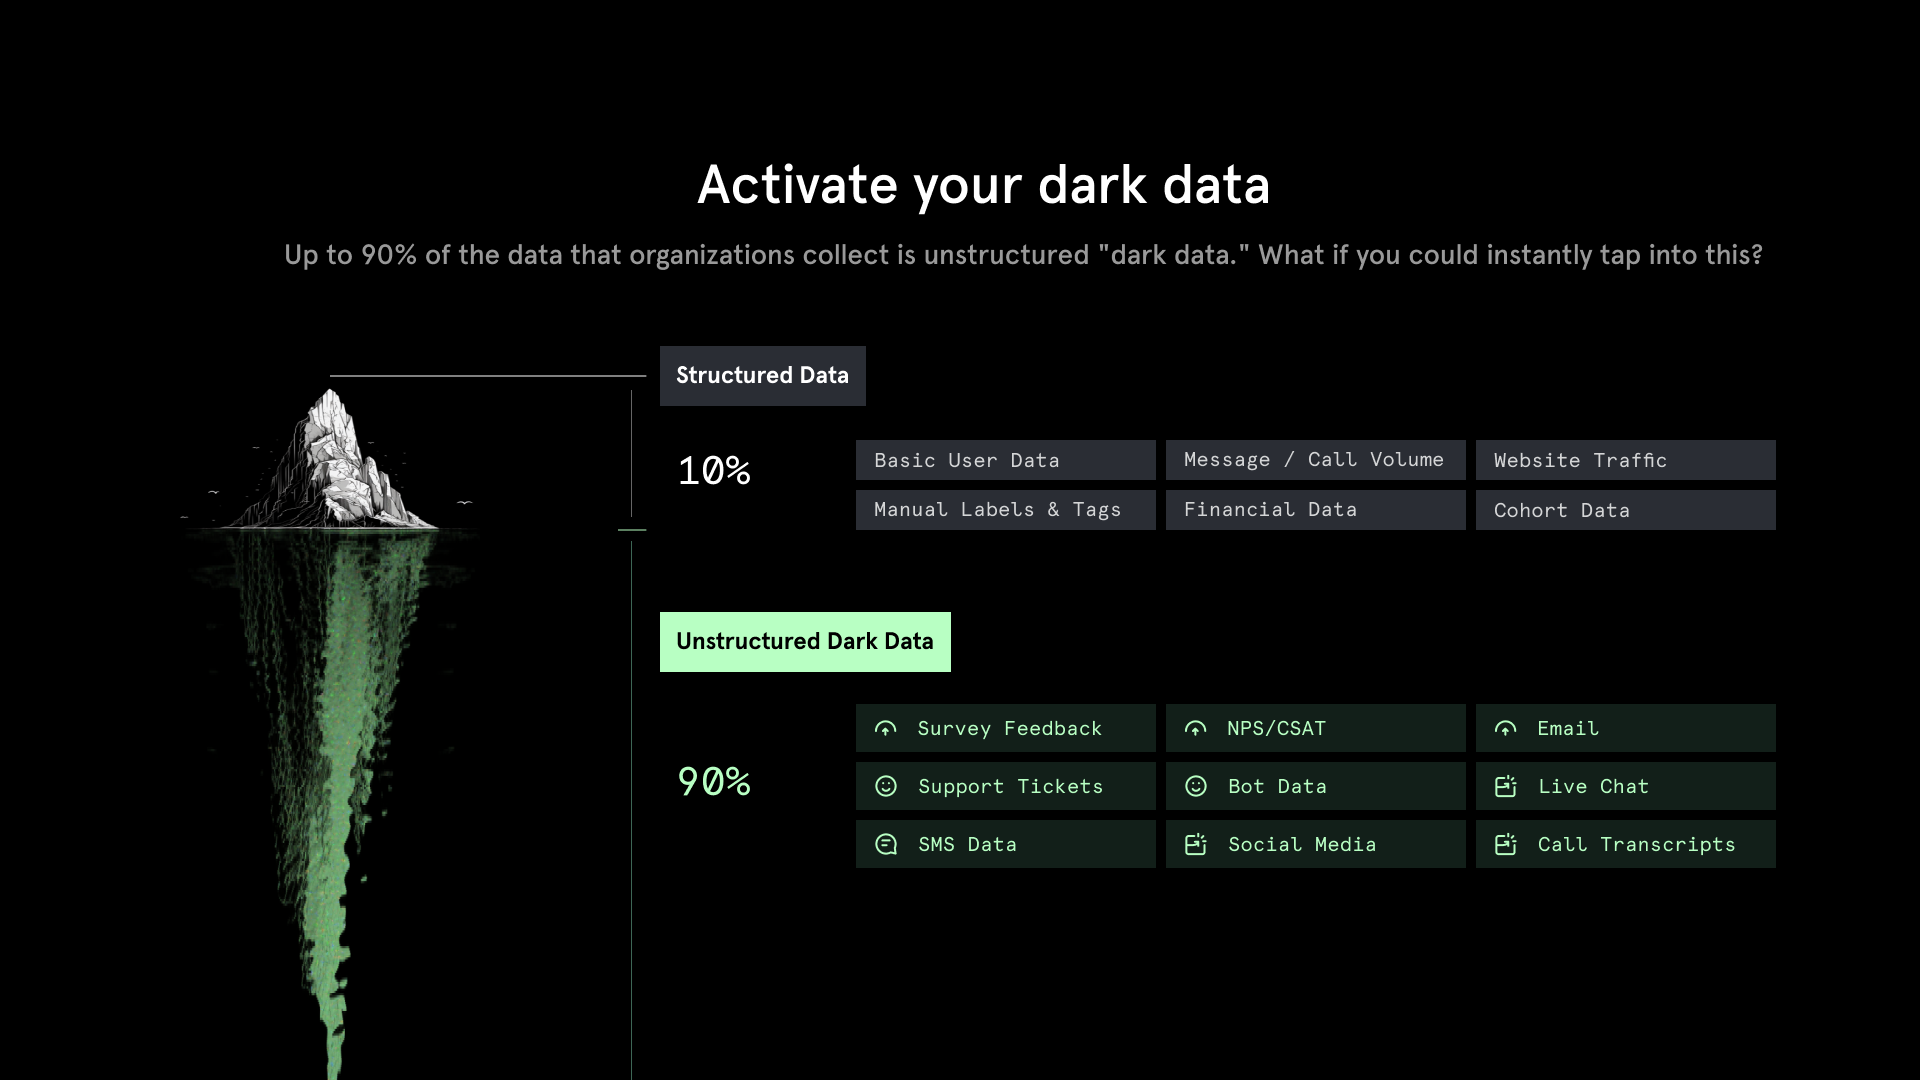
Shedding Light on the Dark (Data)
Up to 90% of the data that enterprises collect today is “Dark Data” – unstructured conversation and textual data that an enterprise collects but fails to ever analyze. Dark data is all around us & growing everyday. Dashbot sheds light on this darkness and allows you to leverage dark data for good.
Your most important insights lie within these customer (CX) and employee (EX) interactions. Siloed unstructured data is a nightmare for your engineering team to centralize and is often a secondary or tertiary task.
Dashbot can connect to your unstructured data sources offering you a unified platform to analyze and pull actionable insights from your Dark Data . (e.g. Zendesk support tickets, Twilio SMS messages, Genesys customer calls, separate Snowflake data, etc).
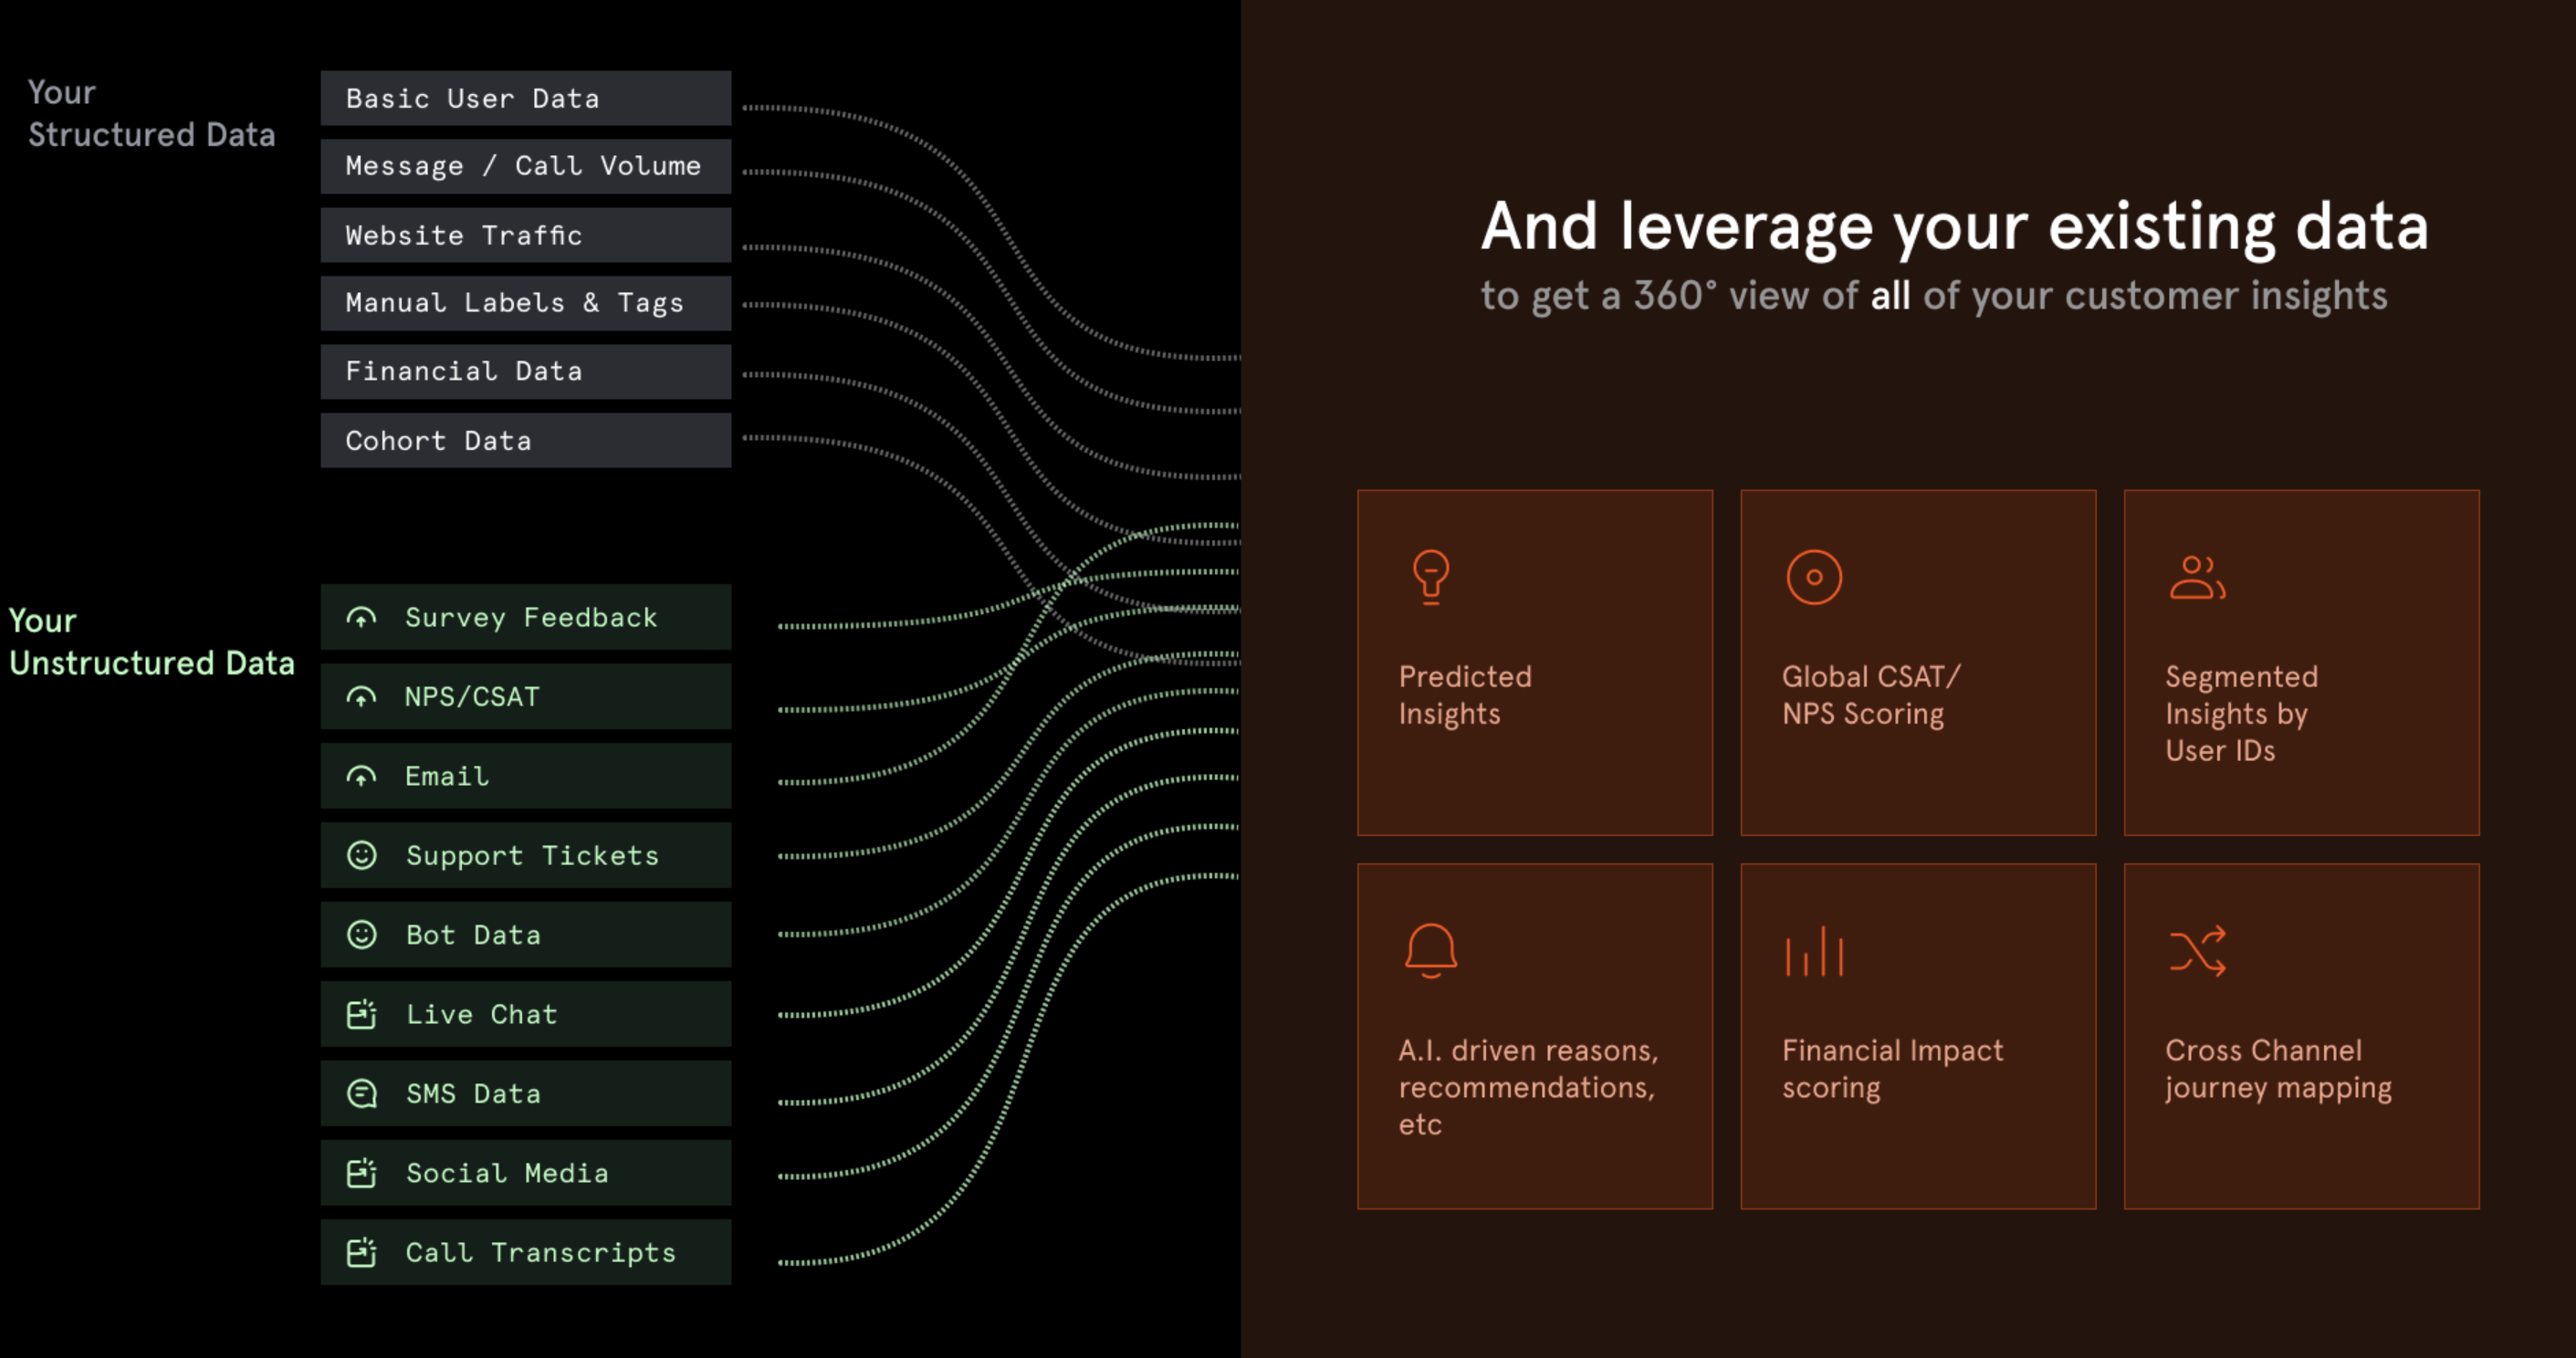
Structuring your Unstructured Data
We have all this Dark Data and we have Dashbot to understand it, what is next?
By leveraging AI via LLMs and NLP models Dashbot can enrich your unstructured data enabling businesses to transform manual insight generation into a systematic and detailed workflow free of bias and full of traceability. Take things even further and combine the enriched unstructured data with other sources of information maintained by your company to unlock new goals backed by AI powered predictive insights.
We at Dashbot are the leading experts in the industry when it comes to helping businesses unlock & analyze the insights locked within their conversations.
Updated 20 days ago